Description
smartLock is the original and best high quality box lock. Developed in 2016 and first offered early in 2017 – it is the favourite of top box makers around the world. Accept no imitations!
Download the smartLock pdf
Experience the unique smartLock ‘live’ action here
• the smartLock box lock is beautifully conceived, made and finished
• smartLock sports a host of intelligent features not found on other locks designed to make it easier to fit
• smartLock is available in polished brass
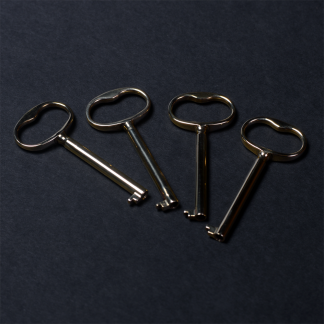
• each smartLock is supplied with one key and plenty of screws.
• extra keys available here
• other features of the smartLock include:
• hook action
• simple, robust design
• crispest, smoothest action of any box lock, 100% reliable
• plates can be squared off for a more traditional look or otherwise customised
• secure key support
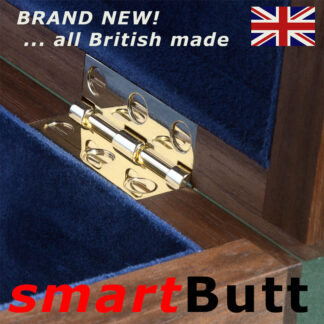
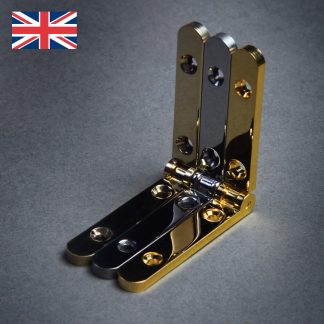
• simple, elegant design, blends with a wide range of styles and matches smartHinge exactly
• 1/4 turn to lock/unlock – no wasted motion as with the more usual 3/4 turn

detailed description
 smartLock:
design/concept:
My intention with this lock has always been quite simply to produce the best box lock available.
For years the market has been crying out for an intelligently designed, high quality box lock – so I’ve intelligently designed one.
Progressing from smartHinge to a matching lock was the next logical step, and one that has been a long time in the planning.
The design of the current lock has been pretty much complete for some time now, but partly due to problems with the smartHinge, and partly due to a lack of commitment and cooperation from the companies involved in its manufacture, its arrival has been hugely delayed. Very frustrating considering that for several years I’ve been asked on an almost daily basis when they might be available …
I’ve not leapt into do this – trust me, I’m a box maker, and have been for 30 years, I’ve used every lock available – and consequently a great deal of careful thought has gone into the design of this one.
The result is a distillation of trad and modern features and designs, taking on board all the best features from old and modern locks alike, with a few new ideas added along the way. The more you think about a lock, the more you discover that there’s a lot to it – and without very careful thought it won’t work or look right, and will be harder to fit than necessary.
smartLock offers a host of smart features not found on other box locks:
• beautifully simple, elegant design – blends with a wide range of styles
• matches smartHinge exactly
• available in polished brass, stainless steel and gold plated
• long plates – elegant look and allows screw holes to be well away from casement mortice, no squaring necessary
• screw holes in from the plate ends – looks better and allows for squaring of plates for a more traditional look …
• innovative, simple, robust internal design – crispest, smoothest action of any lock, 100% reliable
• hook action
• ultra-slim casement, only 5mm thick – so less material to remove to accommodate and allows safe drilling with a standard 6mm brad point bit well in from routed mortices for plates
• elegantly designed and beautifully made key – not too traditional, not too modern – loosely based on a Georgian pattern, superior to anything currently available … see below
• the easiest of any lock to install
• plates are same thickness as smartHinge – so use exact same setup [cutter, height and fence] with different stops
• no undercutting of the top plate needed to accommodate the latch
• low keyhole allows for a wide range of escutcheons to be fitted …
• sighting mark in end of key pin makes keyhole easier to sight and position accurately
• narrow ‘bit’ at the end of key designed to allow a well proportioned, elegant keyhole with a narrow ‘waist’ …
• 1/4 turn to lock/unlock – no wasted motion as with the 3/4 turn found in almost all other locks
• all British made – superbly crafted and finished in the West Midlands
• and a host of other details that just make smartLock so much better than anything else available!
In fact, all you’d expect from this long-awaited companion to the smartHinge.
the key to success:
Getting the key right is a very important part of a lock. We tried everything – fabrication, casting, hot stamping … It had to be good looking, strong, elegant and beautifully finished. Unbelievably the solution turned out to be … machine from solid. So, it had to be done:
I will be adding more to this page over the next few weeks …
AC 01/06/2017
fitting instructions
smartLock fitting instructions:
NB: The main lock plate and the striking plate of the smartLock are exactly the same width and thickness as the smartHinge leaves – this places all polished surfaces about 0.1mm below the surface, protecting them from marking each other when the box is closed. So, if you’re fitting smartHinges and smartLock, the cutter, cutter height and fence position should remain the same for all operations.
If you’re starting from scratch, first fit an 8mm cutter [preferably downcut spiral for cleanest cut] to your table-mounted router. Measure the wall thickness at the front of your box and subtract 8mm – set the distance between your bit and fence to half this value. See ‘Router setup tips’ below.
Set the depth of the cutter and test depth in scrap.
Next you need to make a spacer in order to set the stops either side of the cutter in order to define the length of your cut. The length of this all-important piece is worked out as follows:

where:
A = the length of the spacer
X = the length of the lock
Y = the diameter of the cutter
Z = the length of the box
Make this spacer as accurately as possible and use it to position a stop either side of the cutter. The stops should be no more than about 3mm high otherwise an error can occur when holding the box at an angle prior to dropping on to the cutter. See ‘Router setup tips’ below.
Once the stops are clamped in place make up a strip of scrap the exact length of the box, preferably the same width and about 10mm thick – this allows you to test all aspects of the set up and will give you a second go, if necessary, on the reverse side. Do a test cut as follows: Holding the piece firmly against the fence, register it against the right hand stop. Lower the piece on to the cutter and move to the left until it registers against the left hand stop. Lift off, continuing to registering the piece firmly against the fence and the stop until well clear of the cutter.
Test your lock upside down in the mortice. If it’s a little tight across the width of the lock you will need to repeat the cut with a piece of masking tape against the fence – this will widen your mortice by the thickness of the tape. If your measurements were accurate, the length should be spot on – if you need to make a slight adjustment, shortening the spacer, and resetting the stops accordingly, shortens the length of your mortice, and vice versa. Note that adjusting your stop by a given amount will adjust the length of your mortice by TWICE that amount, so go carefully. Often the thickness of a piece of tape is enough to do any necessary correction.
When certain that the setup is correct, cut the mortices for both plates in lid and base.
cutting the case mortice:
The deep mortice to take the casement is most commonly done by drilling using a drill press, but can be done by other methods – see below.
The casement of the smartLock is slim, only 5mm – so a 6mm drill is more than adequate to give a good fit and ensures that you are not working too close to the edges of the mortices for the plates.
drill press: Fit a 6 mm ‘lip and spur’ bit and carefully set up a fence on the table of your press so that it positions the centre of your drill exactly in the centre of the cutout you’ve already made to take the plate in the box base. Set the cutting depth to approx 28mm – just enough to accommodate the height of the casement. Mark just beyond the extreme ends of the casement on your cutout and drill a hole centred on each of these points. Now drill a series of holes between these two outer holes – you will find using a lip and spur bit allows you to overlap by a quarter of a drill diameter. Usually with a bit of judicious ‘nibbling’ with the drill bit in between your first set of holes you can avoid having to do any cleaning up of the sides of your mortice. If necessary a little work with a sharp chisel will finish things off nicely – but be careful to preserve the clean edges of your original cutout.
The design of the smartLock is such that you will not need to square the ends of the mortice – the screw holes are far enough away to ensure plenty of material for the screws.
alternative ways of cutting the case mortice:
Routing: It’s not advisable to attempt this with a freehand router, but carefully set up using a table- mounted router and stops this can work very well. A system to allow the router to enter the work by foot is very useful for this sort of task – Veritas offers one such system, their ‘foot jack’.
overhead router: If you happen to own an overhead router, this makes the job very easy.
milling machine: This can also work with careful setting up.
For both routing/milling operations above two or three successively deeper passes is the best approach.
by hand: Marked out carefully and cut out using sharp chisels – preferably firmer for the long cuts and mortice for the longitudinal – this can be achieved successfully. Again, great care must be taken not to damage the clean edges of your original mortice.
Whichever way you choose, your lock should now fit easily but snugly in place.
keyhole/escutcheon advice:
Cut the keyhole as follows:
Measure 16mm down from the front of the box, dead centre, and drill a 4mm hole using a lip and spur [brad point] bit. If you are lining the interior of the box it’s best to drill this hole all the way through to the interior of the box – that is, also through the BACK wall of the deep mortise. This makes the necessary filing and shaping operations much easier as it allows for much longer file strokes … If the interior of the box isn’t being lined you don’t have this luxury …
Put the lock in place and view the key pin through the hole you’ve drilled – there is a centre mark to facilitate this. The hole will be a little tight for the main part of the key, but this allows for a little correction by opening the hole out carefully with a small round needle file so it‘s exactly concentric with the pin.
Then cut for the key ‘bit’ – this can be done with a sharp knife, or a piercing saw [best to fit the blade so it cuts on the PUSH stroke] or filed as preferred to your desired shape.
If you’re not fitting a separate escutcheon/plate then this job must be done with the utmost care to produce a keyhole that is as neat as possible, and only as large as it needs to be to enable the key to operate the lock freely. If you’re fitting an escutcheon then this job doesn’t need to be done so neatly initially, it’s just important that the key works the lock freely.
If you’re inlaying a separate escutcheon, when this is inlaid, mark and drill as before, but THIS time the result will need to be as neat as possible.
router setup tips:
• To measure the distance from the fence to the cutter, first rotate the cutter so that the cutting wings are in a line at right angles to the fence.
• To accurately set a stop, first rotate the cutter so that the cutting wings are in a line parallel to the fence.
• Generally speaking, these measurements are best set accurately by making a cut on scrap, measuring that and adjusting as necessary.
• Router hygiene is important – a dry brush is a useful tool to have handy to use to keep the fence and stops clear of chips and dust – you can use it between operations without switching off the router.
• A fence faced with a low friction material should be used for all operations.